Saturday, October 29, 2011

Enjoying Nature at Night with Children

Fifth Weekend Field Trip – Night-time Nature Walk

For each month that has a fifth Saturday I am planning to make an out and about guide to help make your outings a little more fun and science focused.  This month’s outing is perfect for our fall season.  Darkness will arrive earlier and earlier, especially as we set our clocks back next week.  If your children are usually inside or in bed before dark, even your own familiar neighborhood can look quite exotic at night.   Before it gets too cold let’s get our little ones out there to enjoy the darkness without having to miss their bedtime.

Preparation
Choose a Location:  Your night time nature walk can take place at park open after dusk, a local forest, your neighborhood, or even your back yard.  Please be aware that this is also hunting season so you want to avoid any areas where hunters may be shooting.  Many parks that host educational programs will also run night walks.  Be sure to check the age ranges for the program.

Wear:   
         Long Pants to protect legs from any brambles, bumps, 
         and trips.
        Warm clothing – the temperature can drop pretty quickly.
        Sturdy Covered Toe Shoes – it’s very easy to trip in the  
        dark and  covered shoes will keep you much safer.
        Light-Colored or Reflective Clothing if you will be walking  
        near a road.  Reflective belts might be a good    
        investment  if you plan to walk often.

Bug Spray if you live somewhere where insects are still a problem.

Flashlights - Ideally you would use lights with a red filter helps to maintain your night vision.  You can use red plasticrap or tissue paper attached with a rubber band as a filter.  A headlamp would also be much easier to use so that you could keep your hands free for guiding little ones.  Children will likely want to carry their own flashlights as well.

Things to See/Questions to Ask
Feel the Grass – Is it wet or dry?  Has it rained?  Where did the Water come from? Very often in the fall the temperature can fall so rapidly that they grass may be wet with dew.

Look at the leaves on trees – some trees will fold their leaves at night.

Close your eyes – What sounds can you hear that you might not notice at other times?  You will probably hear insect noises and quieter sounds like the wind through the trees, maybe even owl hoots, but you will be unlikely to hear bird calls as you would during the day.
Can you find the moon?  What shape is it tonight? How many stars do you see? 

Look for Eye-shine.  Pets and animals with good night vision have eyes that reflect the light.  You may see the bright shine from cats or other animals as you walk.  In addition you can look for the eyeshine of spiders as a great way of finding them.  To do this, find a grassy area near hedges or some woods. Hold a flashlight on the side of your head, next to your eye. Shine the flashlight on the ground and look for tiny sparkles of blue or green light. Move closer to the light and you should find a small ground dwelling spider.  Wolf spiders are common. See how many spiders you can spot.  Flashlights can also be very helpful for finding spider webs and certainly make them more visible to children than they would be during the day.

Cross Paths with Critters – At night when all is quiet is when animals in urban areas start to move around.  Even in the city there is plenty of nature to be found when the world is quiet.  Do not be surprised if a Deer, Fox, Turtle, Crayfish, Rodent, or other animal crosses your path (I only named a few).  Remember that to see animals the whole party must move as quiet as possible.
Look for Bats.  If you find one explain how bats are not like birds at all, but that they are more like mice with wings.  If you have the time and energy, a round of Marco Polo on a grassy area is a great way to introduce how bats move by echolocation.

Lay down and Look at the Stars – Take a towel or picnic blanket and lay down for a look at what is above us.  As your kids to tell you what to see or just take in the beauty.
Pretend to be an Owl – Have your children pretend to be an owl.  Where do they think they would find food?  What trees look like good places to land?

Tips from the Expert
Keep the walks short at first- preschoolers may only be interested in a 15-30 minute walk.
Do not turn on the flashlights until you absolutely have to as it will destroy your night vision.

You may want to take a few familiar objects to touch or smell.  Have your children close their eyes and see if they can still identify them.  This is a great way to show then that even though we do not have great night vision, our other senses work just as well outside.
If snakes, scorpions, or other animals that you may disturb live in your area, be careful where you walk and be extra careful to wear protective footwear.

Thank you to my friend, Becky Clark, Naturalist at Pennyrile State Forest Park in Kentucky for being my guest expert.  Becky designs and runs nature programs for families and groups visiting the park.  You can see what is going on at Pennyrile on her blog http://www.kspappdev.com/blogs/pennyrile-forest/index.php?blog=true

A Few Words on Fear of the Dark

One thing that we definitely do not want to do is scare our children.  You may want to talk to your kids about the wonderful things that they can see outside after dark.  If they are afraid you may want to wait until they are not resistant.  Also once you are outside, make sure to notice how your child is doing and honor their feelings.  Making them stay in the dark when they are afraid is more likely to increase the fear than to help it go away.   

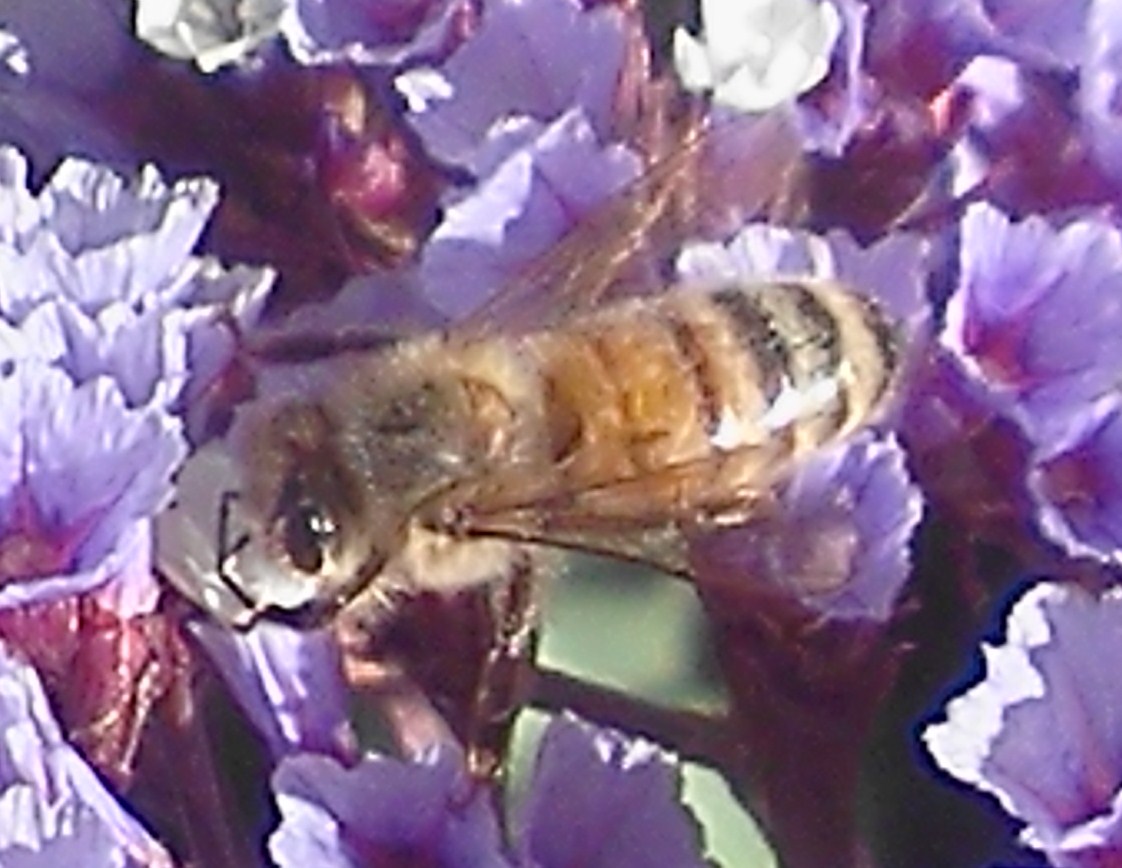
Extension:  Sweeten the deal by attracting some insects to study.

MOTH SUGARING

Supplies needed:

1. 1 almost overripe banana

2. Bowl

3. Spoon

4. 2oz. of apple cider vinegar

5. ½ lb. brown sugar

6. Plastic wrap

7. Small bucket

8. Wide paintbrush

Directions:

1. Peel banana and mash in bowl until pasty.

2. Add vinegar and brown sugar to banana. Mixture should be as thick as latex paint. If it is too thin, add more banana.

3. Cover bowl with plastic wrap and store in warm place indoors overnight.

4. Find an open space with several large trees.

5. Just before sunset, pour mixture into a bucket and use a paintbrush to apply a thick coat of the mixture onto the bark of 3 trees.

6. A few hours after dark, check the trees for moths. Use a flashlight covered with red plastic wrap or red tissue paper. Observe moths and other insects that are eating the mixture.

.

Activities from Night Science for Kids: Exploring the World After Dark by Terry Krautwurst.

Please add your favorite things to find at night this time or year and list your location in the comments area.

Thank you to Becky Clark and Mary Smith for your advice in writing this guide. 

Owl, Bat, Moth and Moon Images by http://www.public-domain-image.com.


Tuesday, October 25, 2011

Toddler Tuesday: Itsy Bitsy and a Spider Craft

Your toddler may or may not be interested in searching for spider webs because they can be hard for kids this age to see and appreciate.  If they aren’t here are a couple of other ideas to get them started learning about spiders.  When researching for this week’s activities, I found a great new version of Itsy-Bitsy that helps to reinforce the body parts lessons that we have introduced earlier in the month.
"A New Itsy-Bitsy Spider"
The itsty-bitsy spider
Crawled up on (Name)'s head.
He crawled all around, then used it for a bed.
He crawled down (his/her) back
and jumped down to the floor.
Then the itsy-bitsy spider
Crawled underneath the door.
 For some reason, my toddler thinks this is hilarious.  It may be the part where I make the spider crawl all over his head.

Spider web craft:
Materials:  8.5X11  Black Paper
                    White Washable Paint - acrylic paint 
                     would work better than fingerpaint.
                   1-2 Marbles  (Choking hazard alert -make sure
                   they don't go in the mouth)
                  Cake Pan

I love this craft because little ones can have great results .  Place the black paper in the bottom of the cake pan.  The parent should dip the marble in white paint and place it in the cake pan.  Then allow your toddler to roll the marble back and forth until you are happy with the look of the spider web. 

Spider Handprint Keepsake Craft:  I love handprint crafts and this is a cute one.
Materials:  Paper
      Black(or other spider color) Washable Paint
      Paint Brush

Paint the palm and fingers of one hand,  being careful to avoid the thumbs.   Press it to the paper.  Wipe that hand off, and repeat with the other hand overlapping the palm so that the palms are the spider’s body and the fingers are each of the 8 legs.  Add eyes however you wish (most spiders have at least 8).  Make sure to label and date your handprint spiders.
We actually combined the two crafts together at my house making bright neon green spiders sitting on our marble painted spider webs (or in our case acorn  painted since I don't think we have marbles :  ) )

Friday, October 21, 2011

The Not-So Scary Spider Search and Web Preservation


The strong fear of spiders that many people have makes them a natural part of the Halloween festivities.  My children have been noticing decorative webs all around our neighborhood.  How about yours?   This week, we will be looking for the real life spiders all around us.  Now I know that this may not be high on your to-do list.   Believe me, though I can tolerate and appreciate spiders, I would not be at all happy to have one land on me.  I certainly was very unhappy when our movers found a black widow in our air hockey table during our recent move (He actually seemed pretty excited about it).    However, spiders are literally all around us and it is a wonderful gift to our children to teach them to respect rather than fear these amazing creatures.  One great way to do that is to appreciate the beauty of the webs that they produce to catch their prey.
Parent Background Guide   
One of the most feared animals in the world is also one of its most common.   There are more than 40,000 different kinds of spiders and they live in every climate of the Earth except for Antarctica.  All spiders have 8 legs, breath air, and are venomous.    Spiders are born knowing how to spin their webs.  Spiders produce the silk thread that they use to construct their webs and can make the silk thick, thin, dry, sticky, smooth, or beaded.  The webs look delicate, but at stronger than nylon.  They eat by injecting stomach enzymes into their prey and then sucking out the insides of the organisms.  Spiders do this because their bodies are too narrow to take in solid nutrition.  Spiders have a variety of ways of catching pray, some spin webs and wait for pray to be caught and other hunt their prey actively.   Spiders typically do not bite unless they are threated, and our fear of spider bites is greatly exaggerated.  In the 20th century only 100 people are known to have died of spider bites (1500 died from Jelly Stings), the majority of spider bites do not produce even as strong a reaction as that of a mosquito.  While the venom of a few species is harmful to humans, scientists are currently testing spider venoms for use in medicines and as non-polluting pesticides.  Most types of spiders live alone.  Males are typically smaller than females and must avoid being eaten by the females in order to survive to mate again.  Females spin an egg case and can lay as many as 100 eggs.  In many types of spiders the females care for the young, either by carrying them or feeding them.   Most spiders live less than two years, but a few species have been reported to live more than 25 years.

My little scientists displaying thier preserved webs.
This week’s activity
Materials The following optional materials can to find and get a closer look at spider webs.  
          Spray bottle of water
          Flashlight for peering into dark spaces.
Discovery time: I know that none of you fabulous ladies (or gentleman) has spider webs in your homes or outdoor spaces as I did so I would suggest going to a public park to look for spider webs. Underneath playground equipment is an easily accessible and very common place to find spider webs within a child line-of-sight. Spritzing webs with water helps to make them more visible. Some of the following questions might stimulate your child to think about what they are seeing: What does the spider web look like? Where do spiders like to build their webs? Did you find any broken webs? How do you think they got broken? Do they look easy to make or like they took a lot of work? Do you think they are pretty (interesting etc)? 

Crafty Fun: Preserving Spider Webs
One of our preserved spider webs.
It is sometimes difficult for children to see close up and appreciate the pattern of a spider web. With the following technique you can capture and preserve an empty web.
Materials
Talcum Powder (or Cornstarch)
Hairspray
Black or other dark construction paper or cardstock (needs to be sturdy).

Instructions: Find an empty web by delicately tapping on a strand. If the spider is sitting on the web you should see it move. Once you find an unoccupied web, spray it with hairspray. Then have your children dust it all over with talcum powder or cornstarch. Next spray the black paper with the hairspray and gently push the paper through the web. You should have the web perfectly preserved for close examination.

Tying it together: If you have done both activities, your children have gotten the chance to explore spider webs both up close and in nature as well. When you find spiders in your environment ask your children about their webs. If you see spider web decorations around you, ask how they look different from real spiders. Some other fun spider crafts and activities can be found on: http://www.enchantedlearning.com/themes/spiders.shtml.

Fun Facts

· Most spiders have four pairs of eyes.

· Jumping spiders can jump up to 50 times their own length.

· Hummingbirds use the silk from spider webs to weave together sticks for their nests.

· Spiders eat more insects than birds and bats combined.

Extension

Watch Charlotte’s web for some lovely animation on how webs are made as well as some feel good friendship for this most feared of all bugs. The Very Busy Spider by Eric Carle is also a great resource and can be checked out from just about any library.


Friday, October 14, 2011

Going on a Bug Hunt!


Creepy crawlies are all around us all the time, but they are very visible in decorations at this time of year.    Incidentally this is also a wonderful time to look for bugs before they seek warmer homes for the winter.   This activity could take 15 minutes of a few hours depending on how much fun you are having.  I will also include some directions in case you want to bring some temporary “friends” into your house for a couple days of observation in the extension section.  The true goal of this exercise is to encourage your children to explore, to tell you what they find, and to get excited about making observations.  Learning about bugs is a wonderful side-effect.  The ability to get excited about finding animals is the biggest prerequisite of this activity; as such it is great for both preschoolers and toddlers so there will be no toddler Tuesday this week.


A pillbug found under a stepping stone.
A word about this exploration:  Many times parents find bugs to be scary or uncomfortable, but children are born finding them fascinating.  I am thankfully not afraid of bugs, my fear is snakes.  My four year old daughter loves them and I just want to be as far away as possible.  I hope that she has no idea how much I do not like them.  When she asks if I think they are pretty, I tell her that they are amazing creatures, but not my favorite.   As a parent, I think that it is very hard, but important to keep from passing on our discomfort to our children.   I would suggest that if insects make you uncomfortable you make sure to use paintbrushes (and perhaps even garden gloves) as suggested in the materials so that you do not have to touch the bugs.  Also remember that some insects do sting or bite, be cautious about what you let your children pick up but know that most insects in the United States are not aggressive so long as children do not pick them up or touch them (except wasps, fire ants, scorpions, and killer bees which you want to stay away from).

Parent Background Guide   
This week we are focusing on organisms that have external skeletons called exoskeletons rather than the internal skeletons that have been our focus of the last two weeks.  During this exploration you will encounter many different types of animals with your children.  “Bug” is a general term.  More specifically you might find the following types of animals:
Insects – animals with 6 legs including ants, bees, beetles, praying mantis, crickets, butterflies, and an infinitely large variety of other organisms.
Arachnids –animals with 8 legs including Spiders, Scorpions, and Ticks
Crustaceans – Pill Bugs, shrimp, lobsters (easy to find under concrete items like stepping stones and borders).
You are also likely to find Molluscs – slugs and snails that are not considered bugs.

This week’s activity

Materials
All materials are optional as the most important part of this exploration is really a willingness to have fun. 
Paintbrushes to sort through leaves and brush away dirt. (I got 3/$1 at Dollar Tree)
Hand magnifying glasses to get a good look.
A camera to “collect” your finds.
Long pants and bug spray if mosquitos and ticks are still a risk in your area.
Discovery time:   
Today’s activity is really about just going outside and looking around.  The following places are great places to find bugs:  flowers, piles of leaves, on the bark of trees, taller grasses, underneath slides and walkways, yellow components of playgrounds, be sure to look under rocks and stepping stones.  As you are looking at the bugs it is a great opportunity to just follow your child’s lead.  Go at their pace, and help them to look where they would like to look, giving suggestions. Take pictures of their finds and let them tell you what they see. 

Tying it together:   
After coming back into the house, I asked my kids to tell me the favorite thing that they found and the thing that was most surprising to them.  We also talked about the fact that there were a lot of different bugs, and that there were lots and lots of differences.

If you or your children are curious about specific insects the following websites are great for identifying what you have found: 
Bug Guide   http://bugguide.net/node/view/15740
Insect Identification for the Casual Observer  http://www.insectidentification.org/

Fun Facts

A beetle found under leaves.
Ø  While gathering food, a bee may fly up to 60 miles in one day.
Ø  Ants can lift and carry more than fifty times their own weight.

Ø  Only female mosquitoes bite human.  Male mosquitoes live on plant juices and decomposing organic material.

Ø  Beetles account for one quarter of all known species of plants and animals. There are more kinds of beetles than all plants.

Extension
Our houseguests!
Rolli Polli Pet –   Armadillidiidae also called Pill Bugs or Rolli-Pollies are very easy to find and to care for in your home.  We are currently entertaining 6 pill bug house guests for the weekend.  Pill bugs do not bite, and will not infest your home.  Care and setup is very simple.  A large glass jar is the perfect home for a pill bug.  Their needs are simple.  Place a layer of moist (not wet) soil in the bottom of the jar.  Also include some small twigs, dead leaves, and if you will be keeping them for a long period of time a small piece of concrete (which they need to eat in small amounts to aid in digestion).   You will want to feed them small amounts of uneaten vegetable matter or dead leaves.  You can give them a variety of different things and your children can see which things they prefer.  Also make sure to mist the jar with water to keep it humid, but not wet.  If you live in a climate that becomes cold, make sure to return your pill bugs to the outside before the ground gets too hard to borough or you can keep them until spring.  Pill bugs can live 2-3 years.  For more information see:  http://www3.northern.edu/natsource/INVERT1/Pillbu1.htm.


Tuesday, October 11, 2011

Toddler Tuesday - My animals have the same parts as me!

Today we are going to use our pets or our toddler's favorite stuffed animals to reinforce the body parts.  Learning body parts is an important goal for toddler self-awareness.  In this short activity we are going to also show them that animals have the same parts as they do helping to build on their natural interest in animals.  This type of activity works best when you only do it once through at a time, but repeat it often.  This is a good time to also practice gentle hands if you are helping your child to point to the body parts on a family pet.
My toddler playing with Linguine (who is an amazingly
sweet and tolerant cat.)
First practice this following song with your toddler:

HERE ARE MY EARS
Here are my ears. (Child points to ears)
Here is my nose. (Child points to nose)
Here are my hands. (Child holds up hands)
Here are my toes. (Child points to toes)

Here are my eyes. (Child points to eyes.)
Both opened wide. (Child opens eyes wide)
Here is my mouth. (Child opens mouth)
With white teeth inside. (Child smiles showing teeth)
 

Once your little one is familiar with the song adapt it for animals (stuffed or real) that you see around you.  For example we have a cat named Linguine so I sing,

Here are kitty’s ears. (Child points to ears)
Here is kitty’s nose. (Child points to nose)
Here are kitty’s legs. (Child holds up hands)
Here are kitty’s toes. (Child points to toes)

Here are kitty’s eyes. (Child points to eyes.)
Both opened wide.
Here kitty’s mouth. (Child points to mouth)
With white teeth inside.

I hope you enjoy this simple and easy to repeat activity.  Next week’s preschooler activity will be hunting for creepy crawlies outside and it is very well suited for all age groups so I will be substituting a book review on Toddler Tuesday instead of an adapted activity, be sure to stop by to see what science books we are reading at our house.  (With shameless promotion of my Usborne site as this month’s book happens to be an Usborne book).  Till Saturday,  keep exploring!


Song from the following great resource for toddler lessons:  http://www.preschoolexpress.com/

Saturday, October 8, 2011

Animals and Us – One Pattern for Infinite Variety


Last week, The Preschool Scientist focused on helping our children to understand what they look like on the inside, specifically their bones.  Today, we will be extending that understanding to animals.  The goals of this lesson are first to help children understand that familiar animals have the same basic body parts as we do and also have bones.  The second goal is to introduce the idea that animals have lots of similarities with one another.  When children understand that animals have bodies similar to ours it inspires both wonder at the variety that they see on our outsides and empathy for other species.    This activity requires very few materials and makes no mess so it would be a great one to do at a Doctor’s office or anywhere that had a wait so long as skeletons had already been printed out.  Finally an educational use for all those stuffed animals that seem to constantly find thier way into your house!

Parent Background Guide   Our lesson today is really a study of basic comparative anatomy.  In comparative anatomy, scientists look at bones and other structures in different organisms to see the similarities and the differences.  This allows them to group and classify these organisms and before we could test DNA it helped scientists to determine which animals were related to each other.  One of the most striking similarities to me is how similar human hand bones are to whale flippers, yet they perform utterly different functions.  In general, animals with a spinal cord are most often studied.  Comparative Anatomy is still a very useful study today and is very valuable to the study of dinosaurs in the field of paleontology where no DNA evidence exists.

This week’s activity

Materials
2-3 Stuffed animals chosen from the list below

Access to the internet or printout of the human skeleton and those of the animals you have chosen.

Preparation:   Choose or allow your child to choose 3 stuffed animals that are interesting to them.  Realistic animals would be preferred, but choosing an animal to which your child has a connection would also be very valuable.  For the purposes of this lesson snakes would be confusing.

Discovery time:   Line the animals up along a couch, chair, table and begin by helping your child find similar body parts on each animal.  Where is the head, the stomach, how many feet does it have, where would the ribs be??  Look at each animal to verify that all of them have the body parts in question.  Instead of asking all the questions, encourage your child to name body parts and you can each take turns finding them.  After you have illustrated that each animal has the same basic parts (and maybe some different ones) take out or view the pictures of the skeletons.  Encourage your child to first match each skeleton with the animal.  This may require lots of help and hints, but try to avoid doing it for your child.  Next, ask your child to point to things that are similar.  All vertebrates have a skull, vertebrae, four limbs, rib cage,{hands, flippers, feet, wings}.

Tying it together:   Now that your child has the general idea that we are all made out of the same parts, both inside and outside, make sure to connect that knowledge with other animals that they see in the world around them.  This will help to get your child thinking about their bodies and the bodies of animals as well.  For example, if you see a bird flying remind your child that their arms are similar to the bones in the bird’s wing.  What do they think it would be like to fly??  The idea here is that knowing our similarities can help children to image what it would be like to be another animal or to determine what is different that makes them different from that animal.  Horses can run faster than us, this is because they use four legs to run whereas we use two of our “legs” to do other things like carry toys. 

Fun Facts


Homologous means structures that are from the same origin (are the same bone), even if they do different things for different animals.

Human Skeleton


Skeleton Images of Common Toy Animals

Common Mammal Stuffed Animals


Non-Mammals


Check Back on Toddler Tuesday for a related activity for the little ones in your house.  Until then Happy Inquiring!